Wednesday, November 21, 2007

I'm still here, just been busy

I'm still here, I've just been busy with the holidays, work, kids, buying a new car, etc. I have also had a couple setbacks. The spray booth we were making was not ready when I was ready to start finishing and the pickups were about two weeks late due to a problem with production at Seymour Duncan. I ended up applying the initial coats of sanding sealer with foam brushes, which meant I also had to do more sanding to get the finish leveled. Now the booth is complete and I just sprayed the next couple coats on one of the guitars. I will spray the other tomorrow and then start with the finishing lacquer. I am using water-borne lacquer for the first time and so far, if it is anything like the sanding sealer, it works great. It is very clear and glosses very nicely without any sanding or polishing (I will still do these steps, but when I sprayed the nitrocellulose lacquer, it was not glossy until I sanded/polished). Before applying any finish, I installed the nuts on the Tele style guitars and put the side fret markers on the rosewood fretboard guitars. Here are some pictures, starting with installing the side fret markers and then the finishing. I did not have the camera with me today, so I don't have any pictures of the spray booth or spraying. I am not going to go into detail with the pictures like I usually do, but there's not much to explain. Some of the pictures are brighter just because they were taken with the flash on.
Here are pictures of the side fret markers being installed. They are actually small pieces of plastic rod. The fretboard is drilled and the rod is inserted and glued in with superglue. The rod is then cut and sanded flush with the side of the fretboard. The top four pictures are the hollow body Telecaster and the bottom four are the Hollow body Les Paul. I have not done this on the green Tele as it does not need to be finished as soon as the other two, but it will be done.


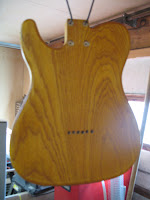
Here are a few shots of the hollow body Telecaster body. I have just begun putting the sanding sealer on. I don't have any good shots with a high gloss because even without using a flash, the lights reflected on the shine and made for not very good pictures. The last picture is the back of the neck. I tinted the sealer to give it an aged look instead of staining the wood, which would make it a much darker amber color.



Here are several shots of the hollow body Les Paul in various angles and at various stages of finishing. Most of these shots are after the lacquer has dried, so you can see that the gloss is fairly good even without any sanding/polishing.


Here is the green, Celtic themed Tele. I have not finished the neck yet, but the body top, sides and back all have one coat of sanding sealer. I will need to apply a few more sprayed coats and then the regular lacquer. The close up shot shows details of the wolf inlay.


Well sorry it has taken so long to post. Life is busy. Most of these pictures were taken shortly after my last post, but I have just not had time to post until tonight. I hope you enjoy the progress. I am planning on finishing the spraying this weekend, wiring and setup the following week, and tweaking/adjusting the first week of December so I can send the two hollow bodies out the second week in time for Christmas. Oh, by the way, the cases have also arrived. Let me know what you think so I know that you are reading this. Thanks,
Aaron

Thursday, October 25, 2007

Long time, no post

OK, so I know, its been a long time since I posted, so what have I been doing? Well, I've actually done quite a bit on the guitars, but have not had a chance to post for a while. I actually spent some time working on them today too, but I forgot the camera, so I will take some pictures tomorrow and try to post again. I am getting these to look like guitars now. I still have not sprayed the lacquer yet, but I am getting things put together so I have the holes pre-drilled before spraying to avoid chipping the lacquer once it does get put on. Here is the amber, semi-hollow Telecaster with the hardware mounted. The electronics are not wired in as I would just have to unsolder everything and they are not the pickups I am using anyway. You can see the neck mounting bushings and the string ferrules on the first picture.


Here's a couple shots of the guitar with the neck in place. I still need to put the nut on the neck and add the string trees, but other than that, it would be playable.


I also decided to work on the hollow-body Les Paul's sunburst finish. The first shot is the amber dye brushed on everywhere but the edges. Next, I mixed up a reddish dark brown color and brushed it on the edges and into the amber. Isn't that a beautiful burst? Pretty awesome lookin', huh?


I didn't think so either, so I took some sand paper and sanded it down to lighten the color and fade the burst like it should be. This was much easier than spraying the burst as it is more controlled and doesn't require any special set up. I also added another coat of the amber tint to it to warm the appearance of the guitar. The bottom two pictures show the guitar with all the hardware mounted (except the pickguard is just laying on the body). Not to bad looking in my own humble opinion.


What about the green goblin? I've done some work on it too. The first picture is the back after using the green grain filler and dying the back and sides green. Then I had to do some modifications to the hardware. The first picture shows the bridge plate/pickup mount with the bridge part cut off and mounting holes drilled. The next picture is the Telecaster pickguard with the second (middle position) pickup mounting rout routed out.


Here's the body with everything laying in place. I have not yet gotten around to drilling the holes, so I have not screwed anything in place yet. The dark spots on the body are from spraying the guitar with water to try to get the finished look, but most of it dried up before I could get everything in place on the guitar and take the pictures.
Well, I'm getting pretty excited about getting these finished. I have a possible three more guitars to be working on in the future, so it does not look like I will be getting bored with this just yet. I will try to post again tomorrow after doing more work if I remember my camera. As always, thanks for looking and please leave feedback for me and let me know what you think.
Aaron

Saturday, October 06, 2007

Body inlay and gluing in the neck, oh, and a bit of color

OK, so my task for the day (two weeks ago) was to put these inlays onto the green Celtic telecaster. Seems simple enough right? Well, the Celtic knot rosette is actually made up of a couple hundred little pieces that go together in a circle and the Telecaster is not a circle. I initially used super glue to glue all the pieces together, then I soaked it in water to get it off the paper backing. The next step was to break it apart into manageable sized pieces so I could fit them on the Telecaster body. the wolf is to go in the "upper bout" area of the body.


Well, I started piecing it out around the body, to see how it would look, but then I decided I should probably start inlaying the pieces as I go along because it will be difficult to get it all the way around and then take them all off to route the cavities and get them all in the right place again. The next several pictures are just showing the progress as I go around the body. The wolf is not inlaid yet, I just have it pictured to show how it will look. I have it positioned so that the wolf head looks normal if it is standing up or in the playing position.


I did not go all the way around the body with the inlay as the pickguard will cover it up anyway. Here is a picture with the pickguard on.


Now to another project. I decided to glue the neck onto the semi-hollowbody Les Paul, but I figured that I should probably drill the holes for the tuners first as it would be difficult to position the headstock onto the drill press with all the added weight of the body at the end of the neck.

Here is the neck in the pocket and then a shot of it being glued in place.


Well, I thought I would go ahead and start adding some color to the bodies (only the two without a sunburst) since I did not have to have the spray booth set up to do that. The green is about the right shade, but I will have to sand down the amber to make it less orange and also to give it more definition to the figure. On the green body, I had to go around with a small paint brush and paint on some sanding sealer to the binding so it would not absorb the dye. I then brushed it on with a foam brush. On the amber Telecaster, I did not have to worry about that as the koa binding is already darker, so it still provides contrast with the dyed maple.


Here is a shot of the green Tele with the pickguard and wolf inlay back on to show what it will look like.


Well, I have actually done more work the last couple days, but I forgot my camera. There is not a whole lot I would have taken pictures of anyway, but I did some more neck shaping, sanding and filling in some spots with wood putty. Also, I ordered the pickups from Seymour Duncan last week and I should be getting them in the next few weeks. I am hoping to have the majority of the finishing done this month so I can wire them up and test drive them for a while before I have to get them delivered to the customers. I hope this has been interesting for you all. Have a good week and I'll try to get more updates next week.
Aaron